

Instructions for CLT 3-8 Rostering

The information on this page applies to both individual test managers (parents/educators) as well as school and group administrators. It is designed to walk you through the 3rd-8th grade rostering process so you know what to expect. 

Rostering your students means inputting their identifying information (name, date of birth, etc.) before they take their exams. This helps ensure the student information is correct, and that each student takes the correct test type. 

Instructions


Students will need to be rostered each time they test. You can only roster your students after you have ordered and the registrations are posted to your CLT account. You will receive an email from CLT letting you know when the registrations are visible.

Step 1: Log In

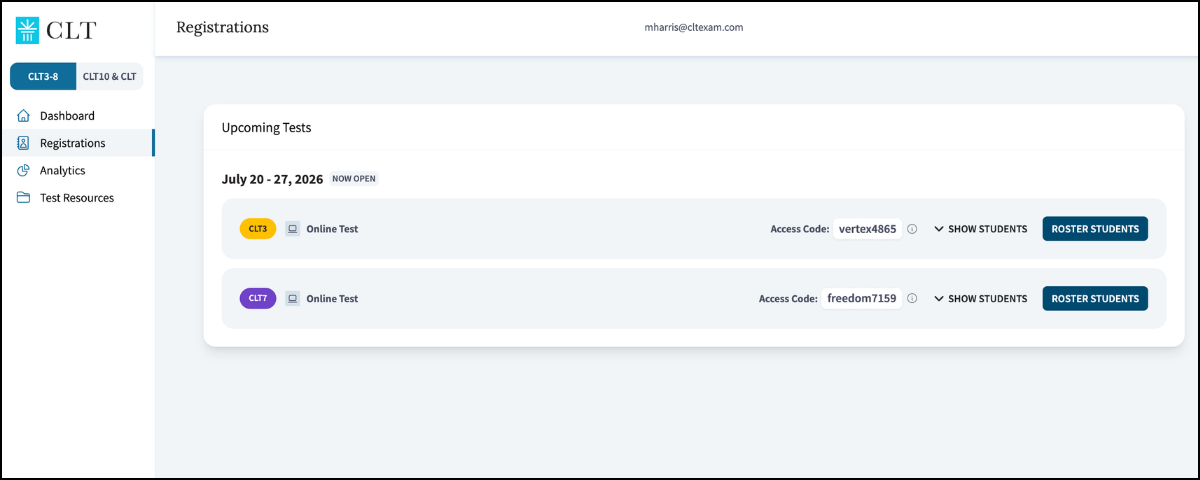
Log in to your CLT3-8 account. You will need to go to the "Registrations" tab to see the test types you have ordered. Each test type has its own rostering button. Be sure you have selected the correct test type when rostering each student. 

3-8 Registrations

Step 2: Select "Roster Students"

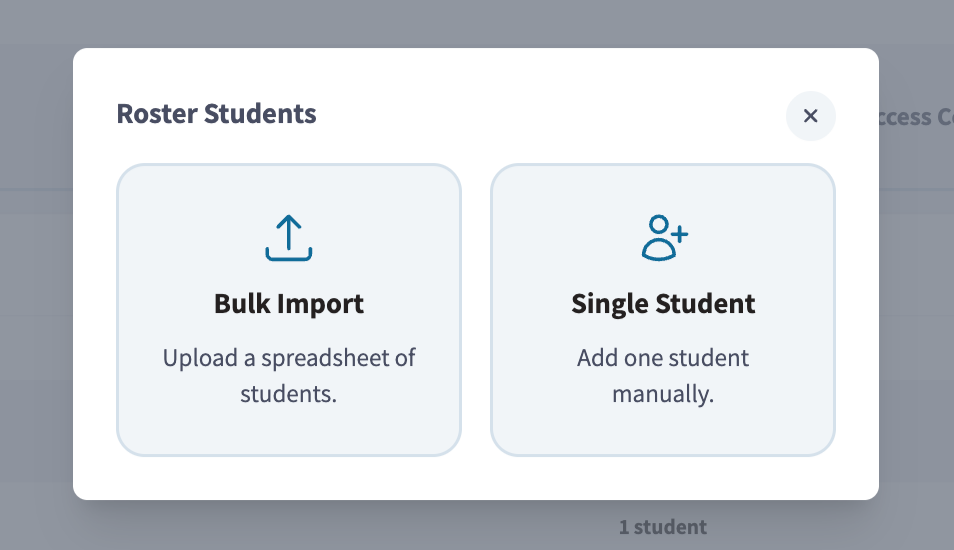
After clicking the "Roster Students" button, you will be asked to choose between a bulk import and a single student. If you have more than 7 students to add for a single test type, we would recommend using the Bulk Import tool. 

Please note that each "Roster Students" button is for the specific test type selected. 

Bulk vs single

Single Student Rostering

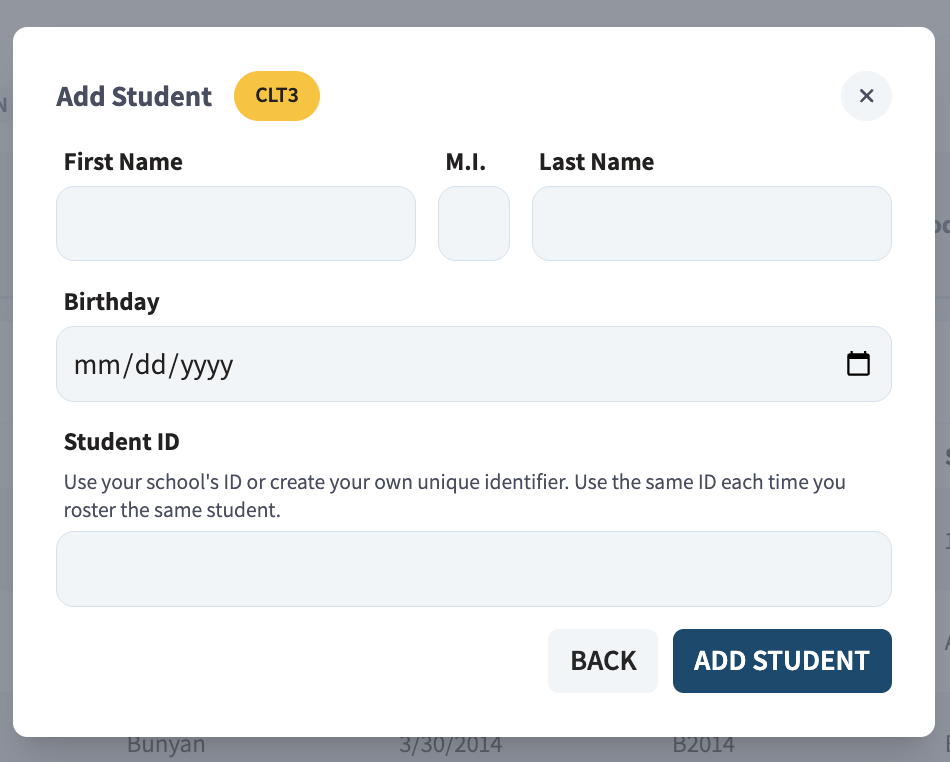
The main identifying details that will be required are the student's name and date of birth.

Additionally, you will see a place to input a "Student ID" (unique identifying code). This is an additional identifier to help associate each student with their account.

You can input any letters or numbers (1-20 characters) here that you would like. If your student does not have an ID number through a school, you may want to use a single number, like “1”. This ID only needs to be unique within your account. You will use the same Student ID for your student in all future CLT3-8 testing. 

Screenshot 2026-07-30 at 10.40.26 AM

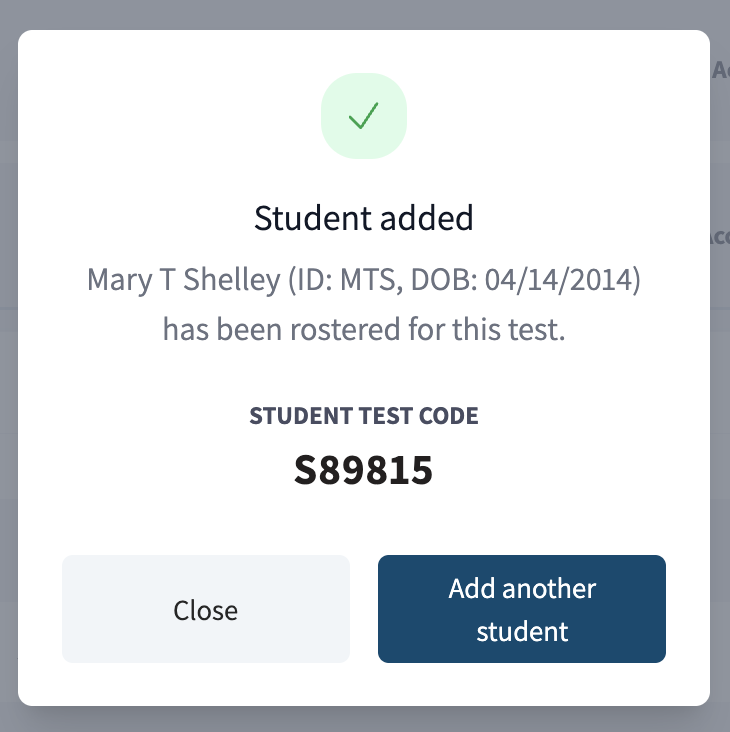
After selecting "Add student", you should see the message to the right. This will include your student's unique test code for this administration. The code will also be visible on your dashboard. 

Screenshot 2026-07-23 at 2.14.52 PM

Rostering Students Who Have Tested Before

You may see one of the below messages if your students have taken CLT3-8 exams before.

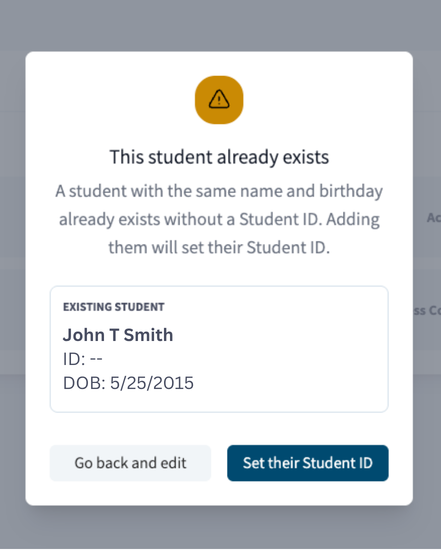
student already exists

If your student took a CLT3-8 exam before Student IDs were required, you will see the above message. You can select "Set their Student ID", and it will complete the rostering process. Their Student Test Code will be visible on the dashboard. 

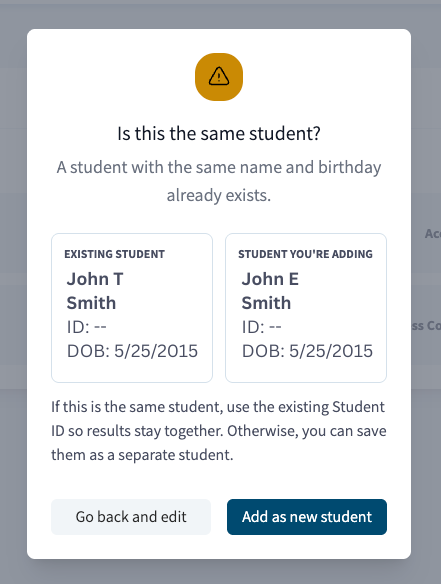
same student

If you see the above message , it means the student has most likely tested previously with slightly different information. You can either edit the information entered, or, if it is a unique student, add them as such. You can contact info@cltexam.com for assistance if the previously entered information is inaccurate.

Bulk Import Rostering

The Bulk Import tool is designed for school or group testing administrators to simplify the rostering process. Please note that you cannot import for multiple test types from the same import spreadsheet.

Download the template file and follow the instructions on the import page.

Make sure you are importing the correct spreadsheet for the correct test type. 

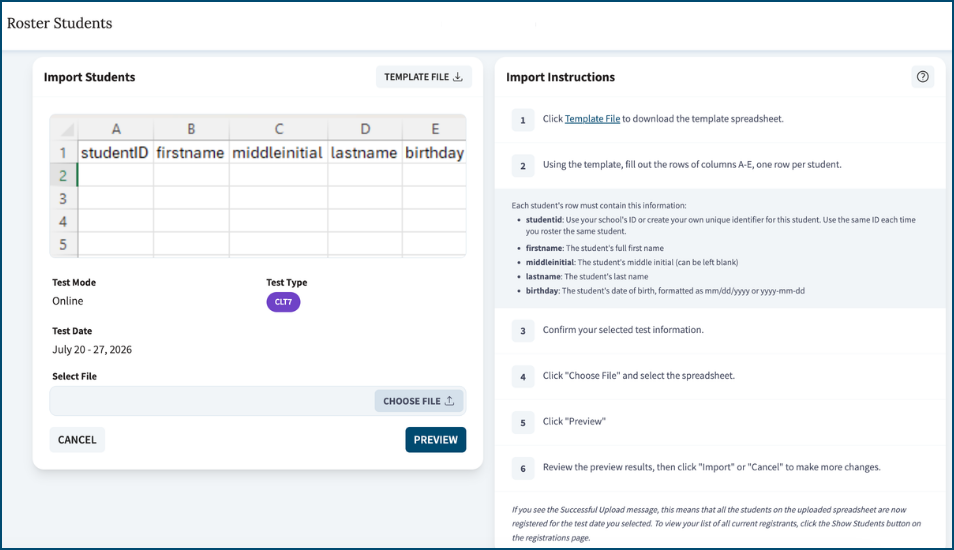
Bulk import page

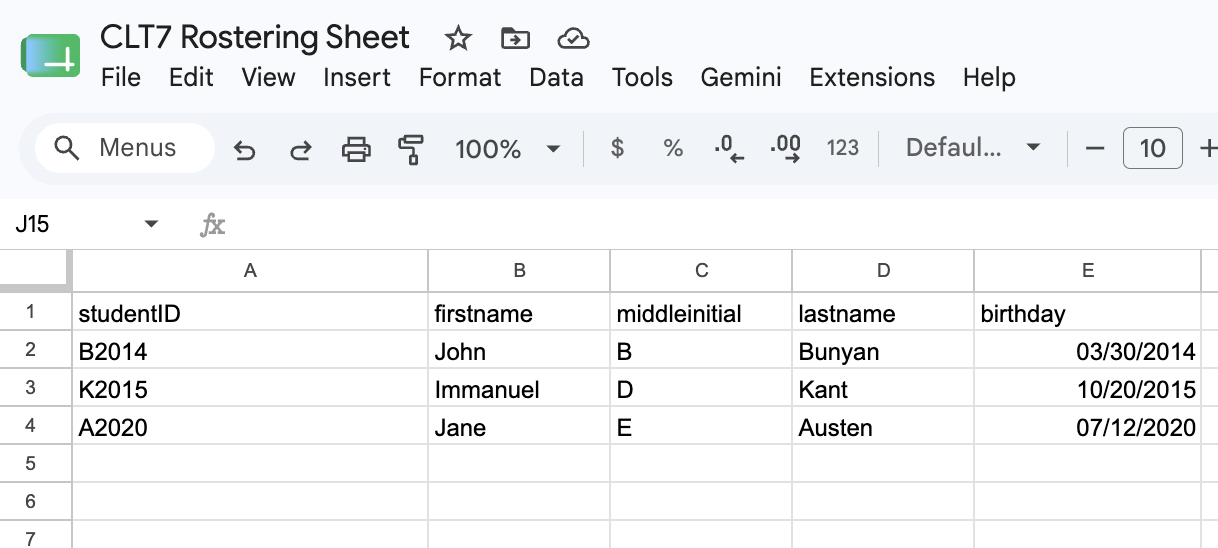
A. Create the Rostering Sheet

Below is an example of what your rostering sheet should look like. 

You will see a place to input a "Student ID" (unique identifying code). This is an additional identifier to help associate each student with their exam.

You can input any letters or numbers (1-20 characters) here that you would like. If your school/group does not have Student ID codes, you may want to use single numbers, initials, or a combination of both. 

The file can be downloaded as a CSV or XSLX. 

Screenshot 2026-07-24 at 11.39.12 AM

B. Preview Student Data

After you upload the sheet to the import page, select "Preview". You will see the following messaging if your students have not tested before. If everything looks correct, select "Import".

Bulk import - new

For students that have tested before: the status will say "Existing" instead of "New". 

If you upload a student who has tested before but their information has a slight discrepancy (e.g. different middle initial or date of birth is one number off), the system will identify the difference and update the student data after you import. This will also update the information on previously taken CLT3-8 exams. 

Bulk import - update

C. Select "Import"

After selecting "Import", you should see a green "Process Complete" message. Each student should say "Rostered" under their status. 

Step 3: Confirm Student Information

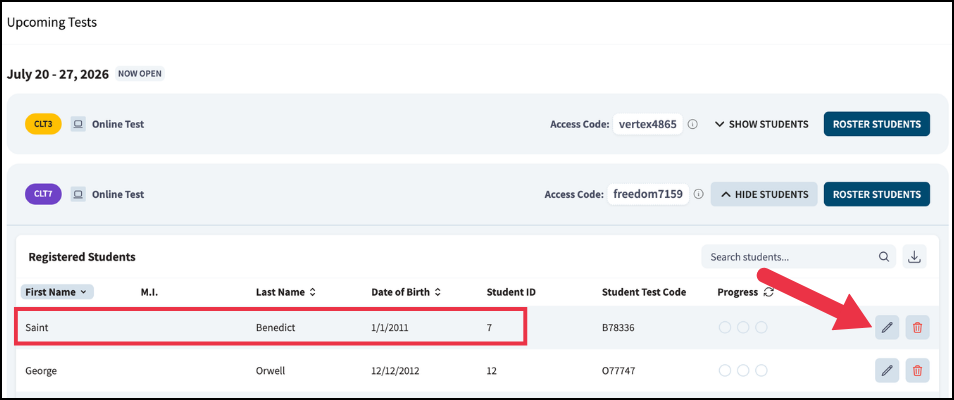
After you have rostered all your students for their appropriate test types, please return to the main "Registrations" tab and double check that the information entered is correct. This is a good time to confirm each student is rostered for the correct test type. 

confirm student info-1

If you need to make any changes, you can do so using the pencil icon on the right of the page. This will allow you to update all the entered student information. If you have accidentally registered a student for the wrong test, you can also use the trash can icon to delete that registration. 

FAQs


How can I add additional students?

You can add additional students either through the bulk import process, or through single student rostering. You will follow the same process you did when you rostered your original student(s).

How can I update incorrectly entered information?

The pencil icon on the end of each student's registration will allow you to make updates to all entered information. Here you can update their name, date of birth, and Student ID if needed. 

What should I do if I rostered a student twice?

There is a red trash can icon next to each untaken student registration. If you accidentally rostered a duplicate registration, or you rostered a student for the incorrect test type, this trash can will allow you to delete the unwanted registration. 

What should I use for a Student ID (Unique Identifying Number)?

You can use any grouping of letters and numbers that you would like. For students that have IDs through their schools, it might be simplest to utilize that code. It must be at least 1 character, and can be up to 20. We often recommend single numbers or initials for small groups of students. You could also do a combination of initials and birthdates. 


Thanks for choosing CLT! If you have any questions after reading this page, please contact us at info@cltexam.com.