Starting Your Remotely Proctored Exam
Accessing the Test
Step 1: Log In
Students will begin the remotely proctored exam by logging into their CLT student dashboard. Make sure you are using the correct email/username when logging in. Check your instruction email for the email address you used when registering.
Step 2: Locate the Test
You will see a box titled "Test Active: Take Your CLT" on the student dashboard. You will also see the test date listed.
If you are logged into an account and do not see the "Test Active" box, you might be logged into the wrong account. Check your emails regarding the test to see which account has your exam!
You can also see which email you are logged in with by looking under the "Welcome" on your dashboard. If you are logged in to the wrong account, you can log out from the menu on the left and log back in with the correct email.
Step 3: Select "Begin Test" to Launch LockDown
Select the "Begin Test" button in the "Test Active" box.
After you select this, it will open CLT's LockDown Browser on your computer. For more instructions or FAQs about LockDown, please see this page.
If you have trouble launching LockDown, please see the above page or use the chat feature on your dashboard!
.png)
Setting Up
As a reminder, this exam is recorded; it is not being watched live. Therefore it is the responsibility of the students to perform the following steps thoroughly.
Your test timer will not start until you have completed the pre-test instructions and begun the first section, Verbal Reasoning.
Step 4: Read Aloud and Sign the Honor Code
Read the Honor Code aloud and then hit the "Accept" button to begin.
Step 5: Prepare Your Space
Carefully review the list of requirements and rules and make any necessary adjustments to your testing environment. See this page for a more detailed review. Select each box after completing.
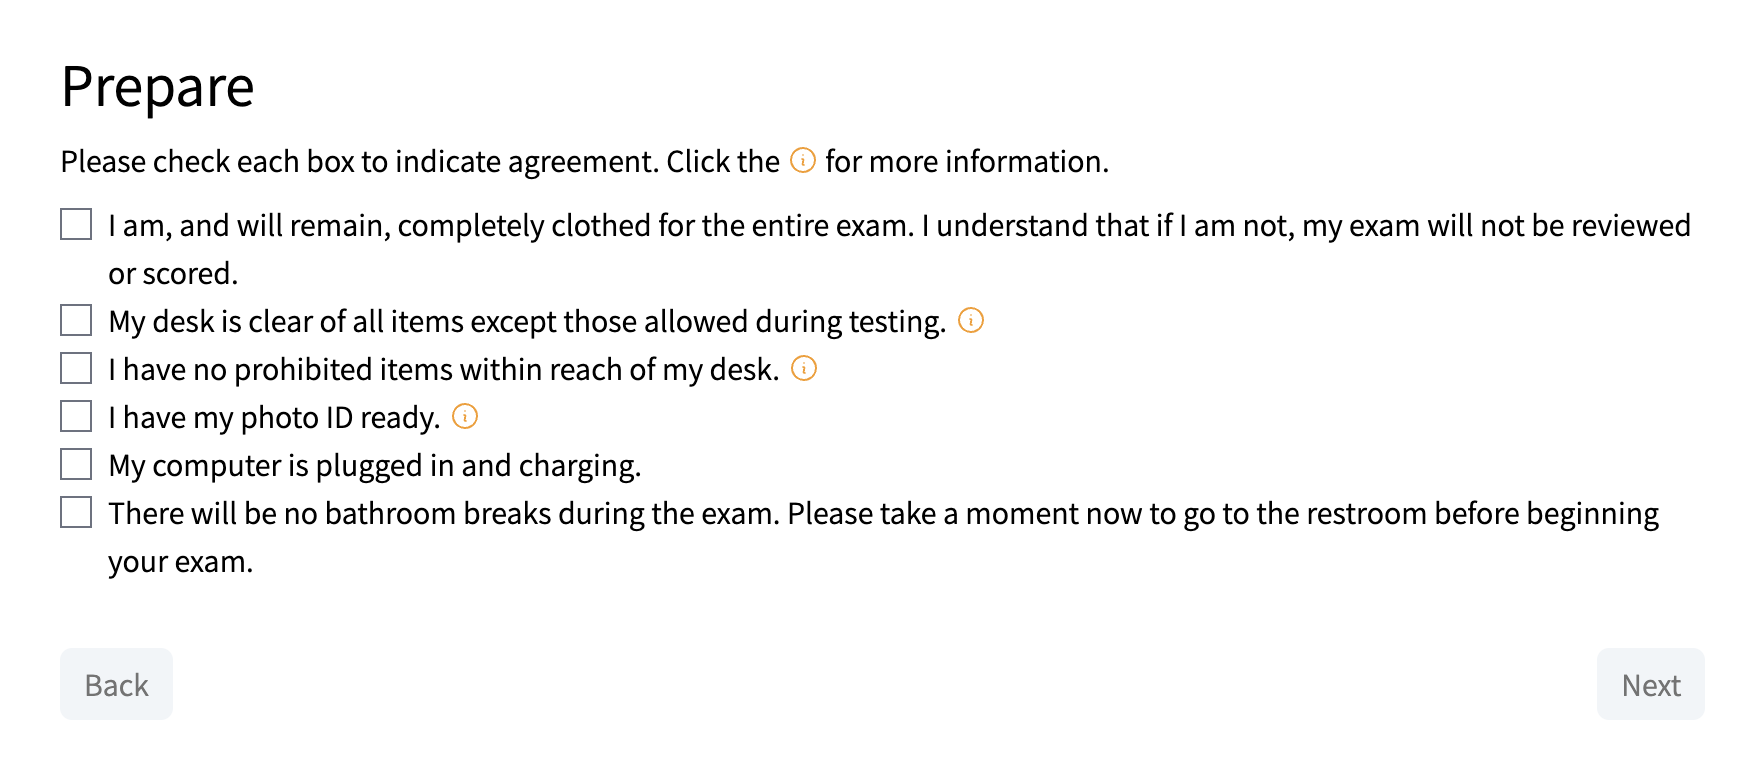
Step 6: Configure Your Technology
Select the boxes to confirm that your browser, volume, and tabs are all configured correctly. Both tech requirements must have a green check. You should get a pop up to allow the camera, microphone, and screenshare in LockDown. Make sure you select "allow" for all three!
See below for more details and instructions on meeting technical requirements. If you do have to any troubleshooting, you will need to exit out of LockDown to do so.
.png?width=400&height=127&name=checks%20(1).png)
In order for your camera and microphone to work, the settings for LockDown Browser and the computer must be set to allowed. In your computer settings, the camera and microphone are both found under Privacy/Security. Make sure the camera and microphone are listed as allowed for LockDown Browser.
If you have issues getting your audio and visual to work, see this guide.

If you have issues getting your screen share to work, see this guide.

If you have issues getting your screen share to work, see this guide.
Step 7: Acknowledge the Rules
Carefully read through these acknowledgements and follow the instructions before agreeing. Please note that by checking this box in the pretest you agree to all stipulations listed:

Completing the Pretest
Step 8: Identification
Show your physical identification to the camera. As a reminder, this could include:
- Driver's License
- Passport
- Student ID
- CLT ID Form
Ensure the ID is close to the camera, the name and picture are in focus, and that you hold it for at least 5 seconds. If you camera is having trouble focusing, you can try holding your scratch paper behind it!
Do not use your phone for your ID. It is not valid and will result in an unscored exam.
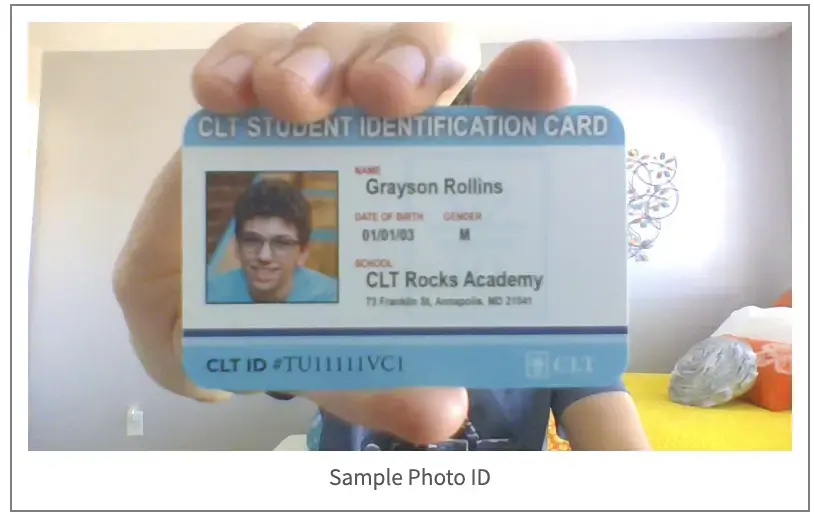
Step 9: Desk and Chair
Show your entire desk/testing surface and then stand up and display your chair.
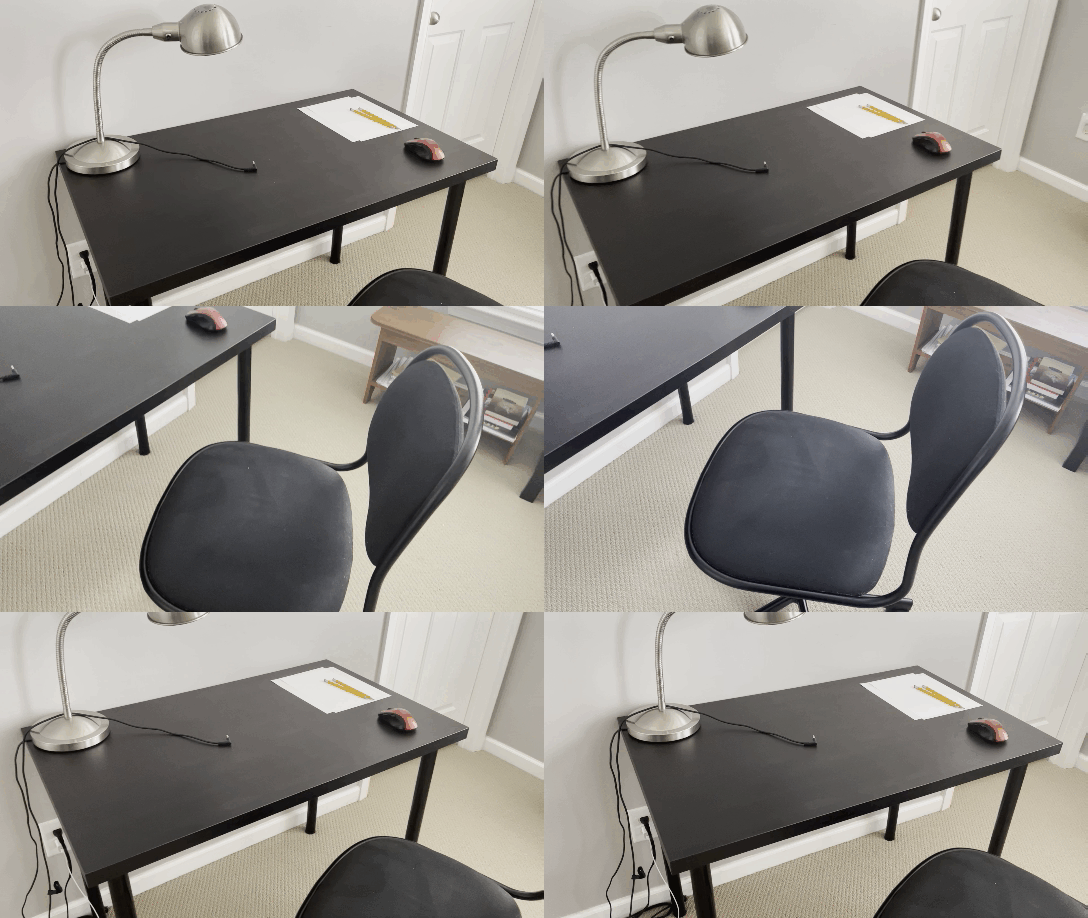
Step 10: Room
You will then show your entire room, circling with the camera slowly.
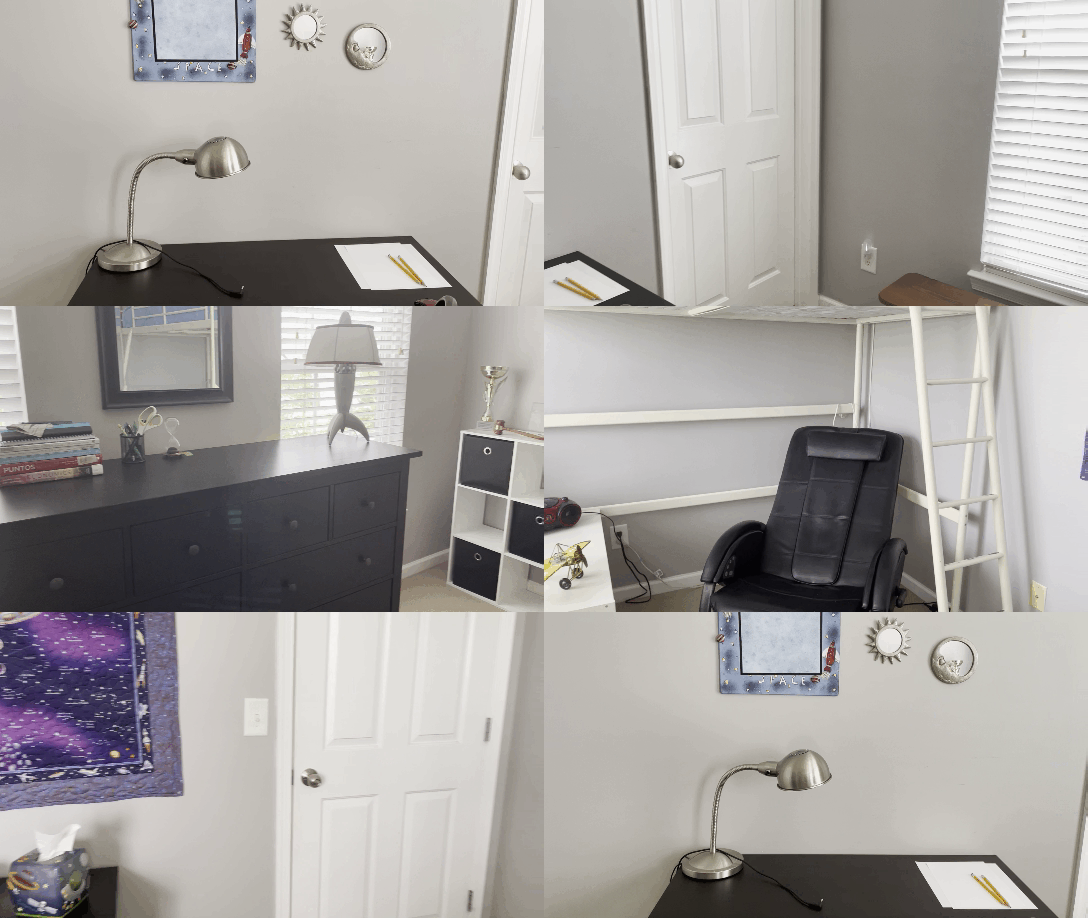
Step 11: Scratch Paper
Display the front and back of each of the pieces of scratch paper you have. You are allowed up to six blank pieces.

Step 12: Ears and Wrists
You will then show that you have nothing in your ears and that your wrists are free of watches of any kind.

Step 13: Verify Recording Transmission
This step ensures that your Wi-Fi connection is stable so that we can receive your video and test answers. If the transmission is taking longer than 10 minutes to load, we recommend testing the internet speed here and then contacting customer support.
Step 14: Start your Test
Once we confirm your pretest recording transmission, click the button proceed to the last page before your exam
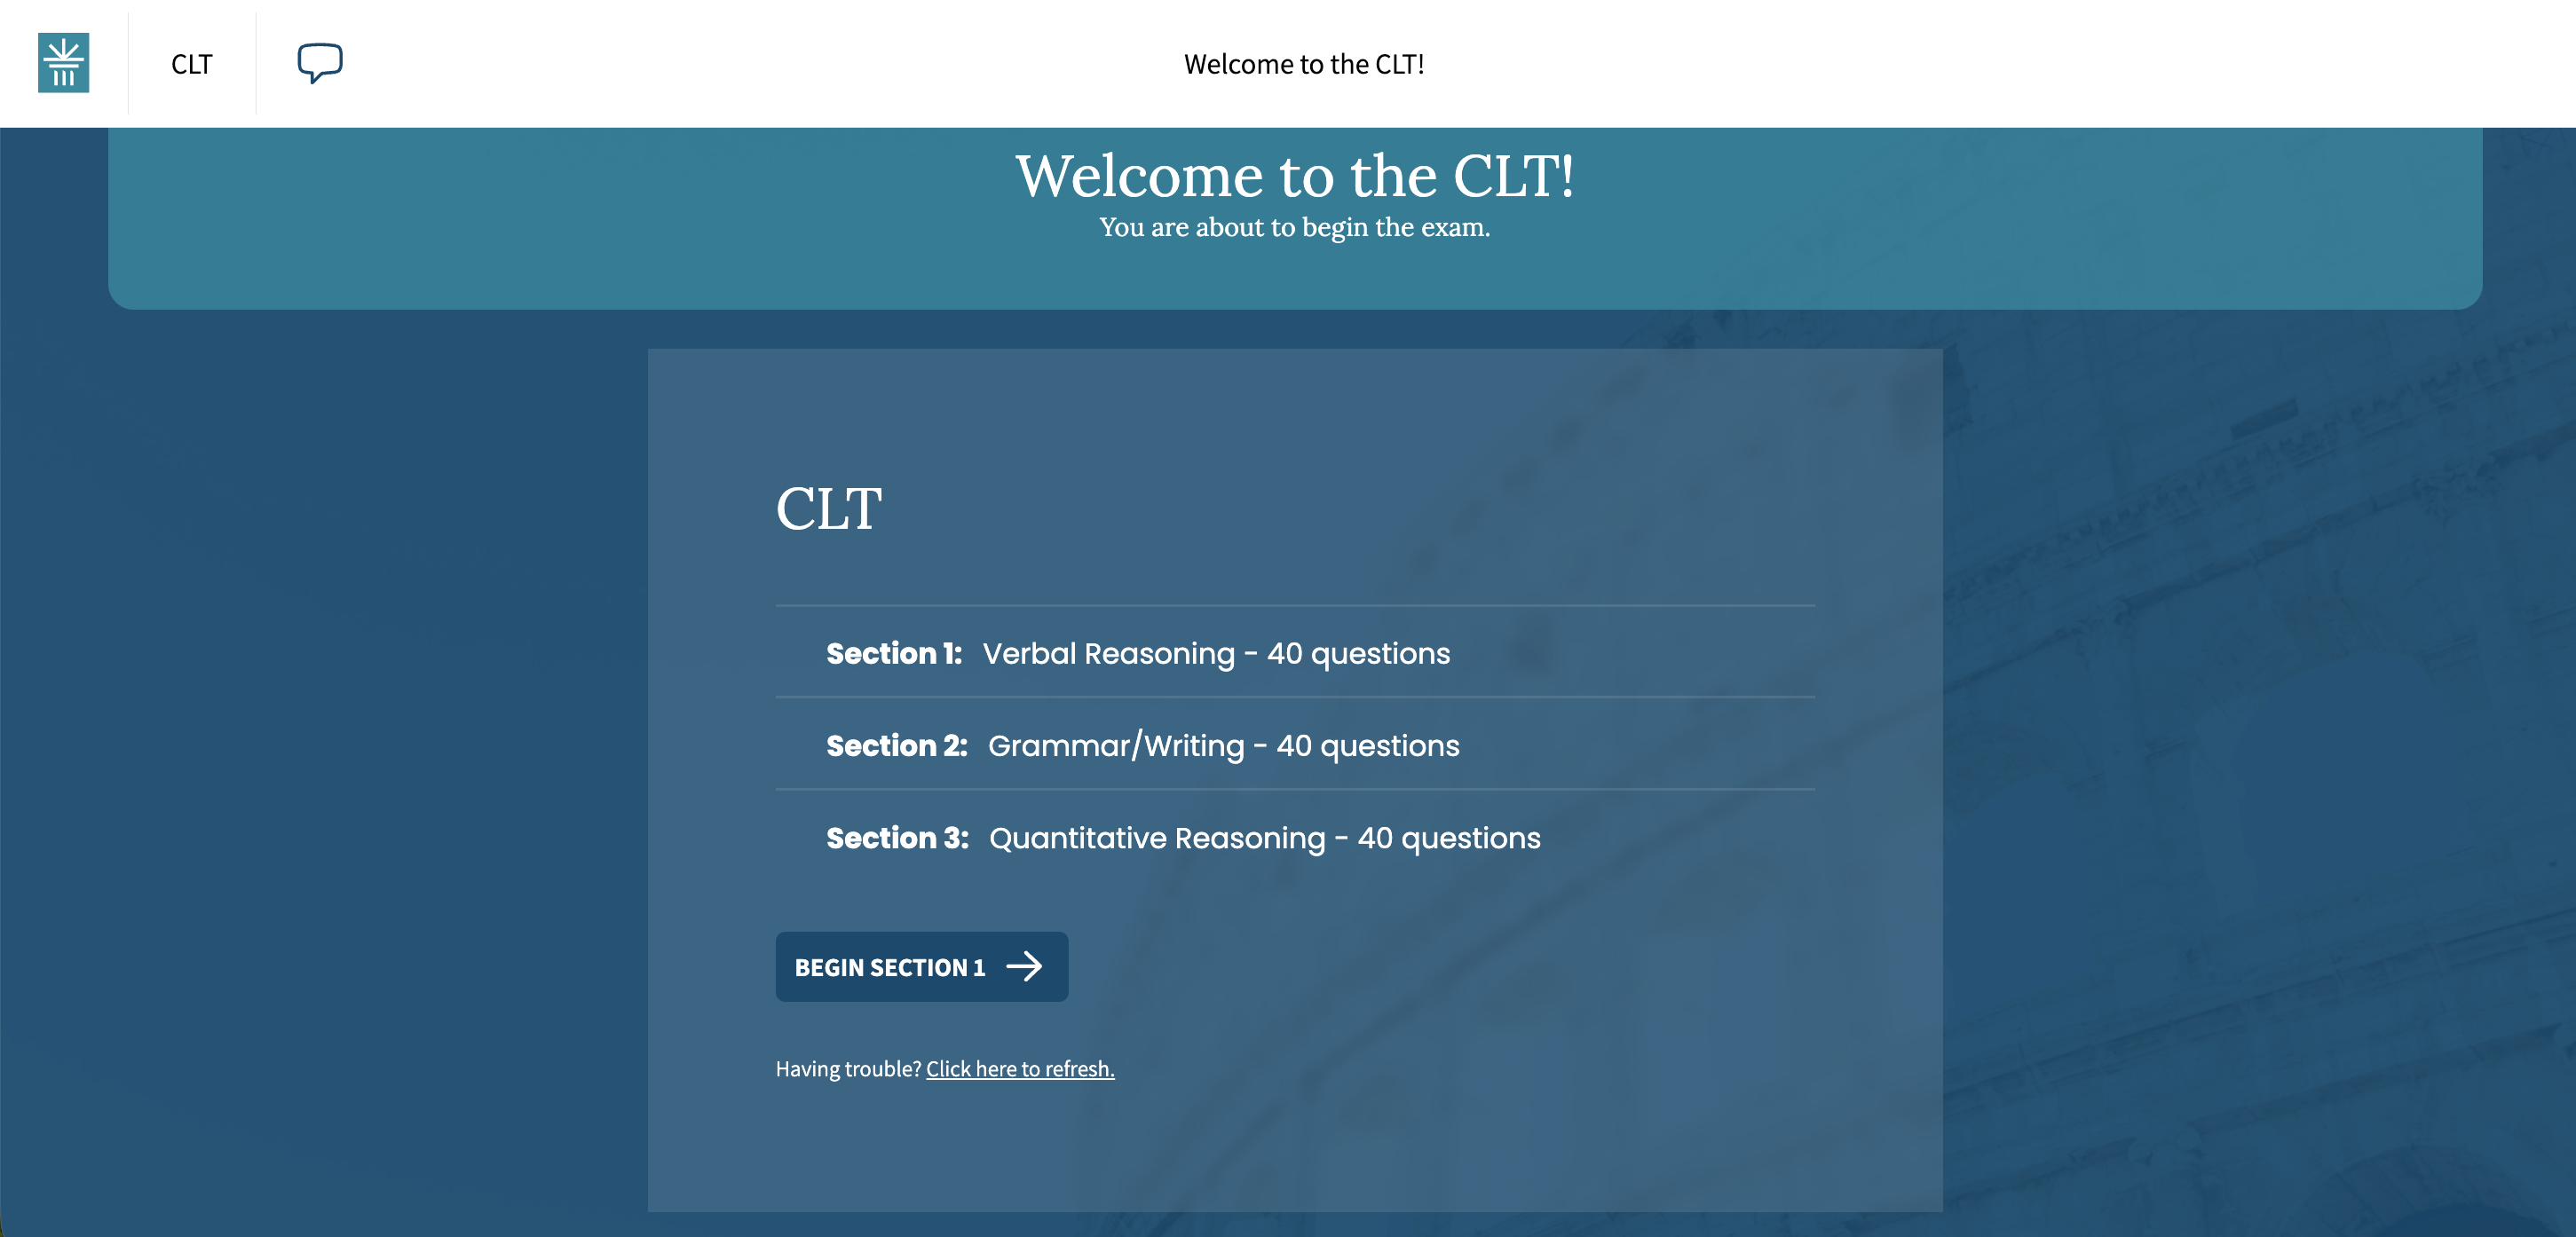
As soon as you click the "Begin Section 1" button, the timer will automatically begin counting down. Read the instructions, and then click and you may begin reading the passage and answering questions.
If you have more questions about test day, please contact us via info@cltexam.com or the chat feature on our website. Best wishes on your exam!

